
How often to clay bar a car depends far less on the calendar than on what your paint actually picks up between washes. A garaged weekend car might go a year or more without needing it, while a street-parked daily driver under trees or near a railway line can feel gritty again within a few months. This guide gives you a simple test and five practical rules so you clay when the paint needs it and not before.
Table of Contents
How often to clay bar: why fixed schedules mislead
Search for advice and you will find intervals that contradict each other. Product makers often suggest two to four times a year, general guides say once or twice a year for a daily driver, and forum veterans argue a well-washed car rarely needs it at all. None of them are wrong for their own car. They are just describing different cars in different places.
Clay works by gripping bonded contamination: particles that have stuck to the clear coat and survive a normal wash. Industrial fallout, brake and rail dust, overspray, fine sap mist, and road film baked on by the sun are the usual culprits. How fast they build up depends on where the car lives and is driven, not on the date.
So the honest answer to how often to clay bar is: whenever the paint fails a feel test after a proper wash. For most owners that lands somewhere between once and a few times a year, but treat that range as an approximate guide, not a rule.
What clay does not fix
- Swirl marks and light scratches: these need polishing, not clay.
- Water spot etching: mineral rings that have etched into the clear coat need a polish or a dedicated water-spot remover.
- Faded or oxidised single-stage paint: clay can clean it but will not restore gloss on its own.
- Rust under the paint: clay only works on the surface.
- Stone chips: these need touch-up paint before rust can start.
The plastic-bag test: your real schedule
This is the single most useful habit for deciding when to decontaminate. It takes a minute and costs nothing. A thin sandwich bag (or cling film over your fingertips) amplifies tiny bumps your bare hand would miss.
- Wash the car thoroughly. A careful two-bucket wash removes loose grit so it does not fool the test or scratch the paint.
- Dry the panel completely.
- Slip your hand into a thin, clean plastic bag.
- Glide your fingertips lightly across the paint with no pressure. Start with horizontal panels: bonnet, roof and boot lid.
- Then check the lower doors, rear bumper and the area behind the wheels, where brake dust and road tar collect.
- If the surface feels smooth like glass, skip clay. If it feels gritty, sandy or slightly rough, that panel needs it.
Test panel by panel. It is common for the roof and bonnet to feel clean while the lower rear quarters are rough. You can clay only the sections that fail, which saves time and limits needless rubbing of the clear coat.
A sensible testing rhythm
Do the bag test every time you are about to wax or seal, and at each seasonal change. If you protect your paint every three months, you have built-in check points. A smooth result means you go straight to protection; a rough one means you add a decontamination step first.
In other words, the bag decides how often to clay bar, not the date on the calendar. Keep a note of which panels fail each time and you will quickly learn your own car’s pattern.
Exposure factors that speed up contamination
Two identical cars can need very different decontamination intervals. The table below shows how common conditions affect the build-up of bonded contamination. Intervals are approximate starting points for when to run the bag test, not fixed claying dates.
| Condition | Main contaminants | Contamination rate | Suggested bag-test check |
|---|---|---|---|
| Garaged, weekend use | Light road film | Low | Every 6 months |
| Garaged, daily commuter | Road film, brake dust | Moderate | Every 3-4 months |
| Street parked, city | Industrial fallout, soot, brake dust | High | Every 2-3 months |
| Parked under trees | Sap mist, pollen, bird droppings | High | Monthly in sap season |
| Near railway lines or industrial sites | Iron particles (rail dust) | High | Every 2-3 months |
| Coastal air | Salt spray, mineral deposits | Moderate to high | Every 2-3 months |
| Winter roads with grit and salt | Tar, salt film, iron | High | After winter, then quarterly |
Trees and sap
Trees drop more than visible blobs of sap. Fine sap mist and honeydew from insects settle as tiny specks that feel like sandpaper under the bag. Large drops should be dealt with promptly; our guide on how to remove tree sap from car paint covers solvents and softening methods. Mazda’s owner care guidance warns that tree sap hardens and can adhere permanently to the finish, which is why softeners and clay beat scraping with a fingernail.
Rail dust and brake dust
Hot iron particles from train brakes, rails and your own brake discs embed in the clear coat and later rust into tiny orange dots, most visible on white and light silver paint. Cars stored or transported near rail lines are particularly prone to this. These particles respond best to an iron remover before clay, as covered below.
Coastal and winter conditions
Salt air leaves a mineral film that bonds with road grime, and winter grit adds tar spots to the lower panels. Owners in these environments usually find the lower third of the car fails the bag test long before the roof does.
Do you need to clay bar a new car?
Often, yes, but only if it fails the test. Many people assume factory-fresh paint is spotless. In reality, a new car may have spent weeks in storage lots, been shipped by rail or sea, and sat outside at the dealer. Rail dust, transport film and industrial fallout can all bond to the clear coat before you collect it.
Do the bag test on the first proper wash. If the paint is glassy, you can skip clay entirely and apply your chosen protection. If it feels gritty, a light decontamination before the first coat of wax, sealant or ceramic coating is worth it, because any protection you lay down will lock contamination underneath.
- Use a fine-grade clay or a fine clay mitt on new paint; aggressive grades are rarely needed.
- Use iron remover first if the car arrived by rail or shows orange specks.
- Check your new-car warranty or owner’s manual for any paint-care guidance before using strong chemicals.
- If the car already has a dealer-applied coating, ask what product was used before claying, as clay can abrade some coatings.
Freshly painted panels after a body repair are a different case. Refinish paint may still be curing, so follow the body shop’s advice on when it is safe to clay, wax or polish.
Can you clay bar a car too much?
Yes. Clay is not a polish, but it is still a mildly abrasive tool being rubbed across the clear coat. Each session carries a small risk of marring: fine hazy scratches, especially on soft or dark paint. Detailers commonly polish after aggressive claying for this reason.
Over-claying also strips the wax, sealant or part of the coating you paid for, so you lose protection and have to reapply it. That is why the right answer to how often to clay bar is driven by the bag test, not habit. Clean paint gains nothing from extra passes.
Signs you are overdoing it
- You clay every wash or every month on a car that is garaged.
- Panels look hazier or show fine scratches in direct sunlight after claying.
- Your wax or sealant never seems to last as long as advertised.
- The clay comes away clean, with no visible specks, every time.
How to reduce the risk
- Use generous lubricant; never clay dry paint.
- Use light pressure and let the clay glide.
- Fold or knead traditional clay often to expose a clean face.
- Throw away clay that has been dropped on the ground.
- Work small sections, roughly 50 cm square, and wipe each one before moving on.
Clay bar vs clay mitt vs chemical decontamination
Traditional clay is no longer the only option. Synthetic clay mitts, towels and pads use a rubber polymer layer that does the same job faster, and chemical removers dissolve some contamination without rubbing at all. Each has a place.
| Method | Best for | Strengths | Drawbacks |
|---|---|---|---|
| Traditional clay bar | Heavy, stubborn contamination; enthusiasts | Very thorough; feels every speck; cheap | Slow; must be discarded if dropped; can mar |
| Clay mitt or towel | Regular maintenance on larger cars | Fast; rinse clean if dropped; easy to hold | Covers large areas at once, so marring can spread; less precise |
| Clay pad on a machine polisher | Detailers decontaminating many cars | Very fast on flat panels | Needs skill and a polisher |
| Iron remover (spray) | Rail dust, brake dust, fallout | No rubbing; colour change shows reaction | Strong smell; does not remove sap, tar or overspray |
| Tar and adhesive remover | Tar spots, sap residue, sticker glue | Softens deposits before clay | Solvent-based; keep off trim and test first |
Is a clay mitt as good as a clay bar?
For routine maintenance, a good clay mitt does most of what a bar does in a fraction of the time, and you can rinse it if it hits the floor. For heavily contaminated paint, many detailers still prefer a traditional bar because it is easier to control and lets you feel exactly where the grit is. A sensible split is a mitt for regular checks and a fine bar for problem areas.
The best order for a full decontamination
- Wash the car and rinse well.
- Spray iron remover on the paint and wheels; let it dwell as directed, then rinse.
- Treat tar spots and sap with a dedicated remover.
- Clay any panels that still fail the bag test.
- Rinse, dry and inspect in good light.
- Polish if needed, then protect.
Doing the chemical steps first means the clay has less to pick up, which reduces the risk of dragging hard particles across the paint. It also stretches the gap between sessions, so the method you choose changes how often to clay bar as much as where you park.
Do you need to wax after using a clay bar?
Yes. Clay removes contamination, and with it most of whatever wax or sealant was on the surface. You are left with clean, bare clear coat that is exposed to UV, bird droppings and new fallout. Skipping protection now means the paint fails the bag test again sooner.
Carmakers stress how quickly unprotected paint can suffer. Mazda’s appearance care guidance notes that bird droppings contain acids that can eat away the clear and colour base coat if not removed, and recommends regular washing and waxing to preserve the finish. A freshly clayed car with no protection is exactly the surface that advice is aimed at.
Choosing your protection
A carnauba wax gives a warm gloss but wears quickly. A synthetic sealant typically lasts longer, and a ceramic coating can last much longer again with correct care. Our comparison of ceramic coating vs wax vs sealant explains durability, cost and prep for each.
- Before a ceramic coating: clay (and usually polish) is essentially mandatory, because the coating bonds to whatever is on the surface.
- Before a sealant: clay if the paint fails the bag test; wipe with a panel prep spray if the product recommends it.
- Before a wax: clay only if needed; many waxes tolerate light residue.
Good protection also stretches your decontamination interval. Contaminants struggle to bond to a slick, protected surface and often rinse away at the next wash.
The 5 smart rules, summed up
If you want one checklist to keep, use this. It replaces a fixed calendar with decisions based on what your paint is telling you.
- Test, do not guess. Run the plastic-bag test after every proper wash before you wax or seal. Clay only panels that feel rough.
- Adjust for exposure. Street parking, trees, rail lines, coastal air and winter roads all shorten the gap. Garaged, lightly used cars can go much longer.
- Check new cars too. Transport and storage leave fallout on fresh paint; test before the first protection coat.
- Go chemical first. Iron and tar removers take out a lot of contamination without rubbing, so clay has less to do.
- Always protect afterwards. Wax, sealant or coating keeps the paint clean longer and helps shield it from etching.
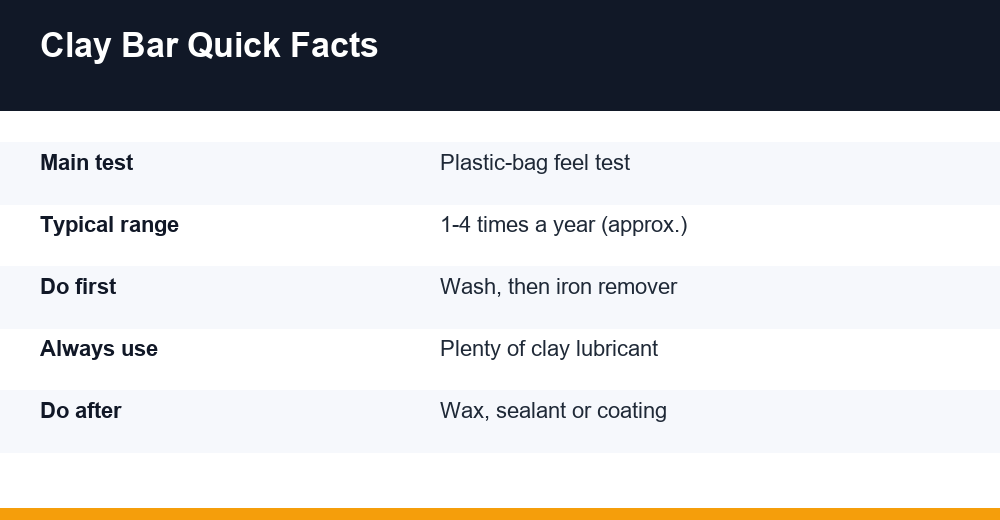
For a typical owner, these rules usually mean claying somewhere between once a year and once a season, which is the realistic answer to how often to clay bar. Treat that as approximate; your bag test is the deciding vote.
Quick maintenance plan
| Task | Frequency (approximate) |
|---|---|
| Safe hand wash | Every 1-2 weeks |
| Plastic-bag test | Before each wax or sealant, and each season |
| Iron remover | When rust specks appear or bag test fails |
| Clay bar or mitt | Only on panels that fail the test |
| Wax or sealant top-up | Per product label, often every 1-6 months |
Frequently Asked Questions
How often should you clay bar your car?
There is no fixed schedule. Run a plastic-bag test after washing and clay only when the paint feels gritty. For most daily drivers that is roughly one to four times a year, with garaged cars at the low end and street-parked cars near trees, rail lines or the coast at the high end.
Do you need to clay bar a new car?
Often, but test first. New cars can collect rail dust and industrial fallout during transport and storage. If the paint feels rough under a plastic bag after the first wash, use a fine clay or mitt before applying protection. If it feels glassy, skip clay and go straight to wax, sealant or coating.
Can you clay bar a car too much?
Yes. Clay is mildly abrasive and can leave fine marring, especially on dark or soft paint, and every session strips your wax or sealant. Clay only when the bag test shows contamination, use plenty of lubricant and light pressure, and discard clay that has been dropped on the ground.
Is a clay mitt as good as a clay bar?
For routine maintenance a clay mitt is quicker and can be rinsed if dropped, so it suits most owners. A traditional clay bar gives more control and feel on heavily contaminated paint. Many detailers use a mitt for regular decontamination and keep a fine bar for stubborn spots.